Creating a Lease
Leases are created from Applications. Please create one to start the Lease creation. Once your applications have been created it is time to accept an application and create a lease. Follow the steps below to search through applications and start taking incoming lease payments
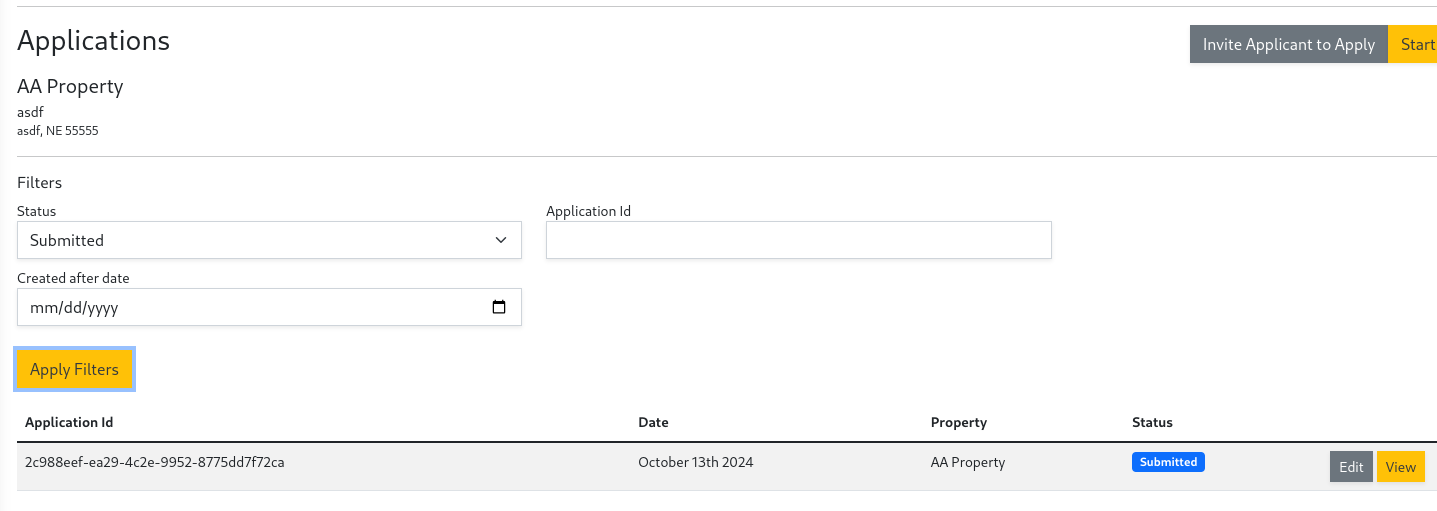
- In the left navigation panel under
CustomersselectApplications. - Within the applications window select the
Submittedstatus and clickSearch. - Browse the submitted applications and click
Viewon the one you would like to accept.
- After reviewing the application click
Approve and Create Leaseat the bottom of the page

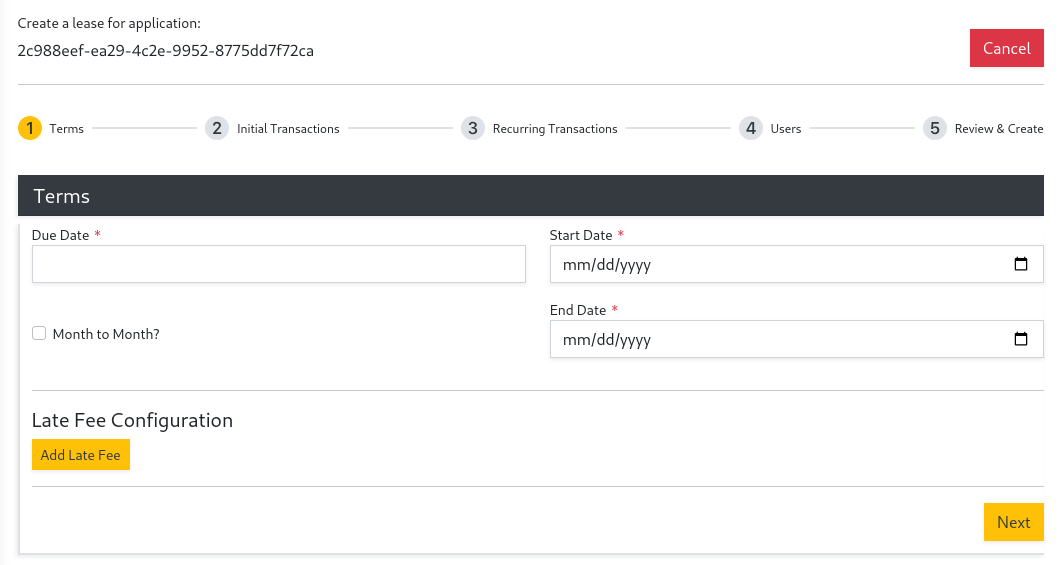
- Under Terms input a
Start Date,Due Date, andEnd Date, or checkMonth to Monthif there is no End Date. You can also add the automatic late fee configuration on this page. Then clickNext.
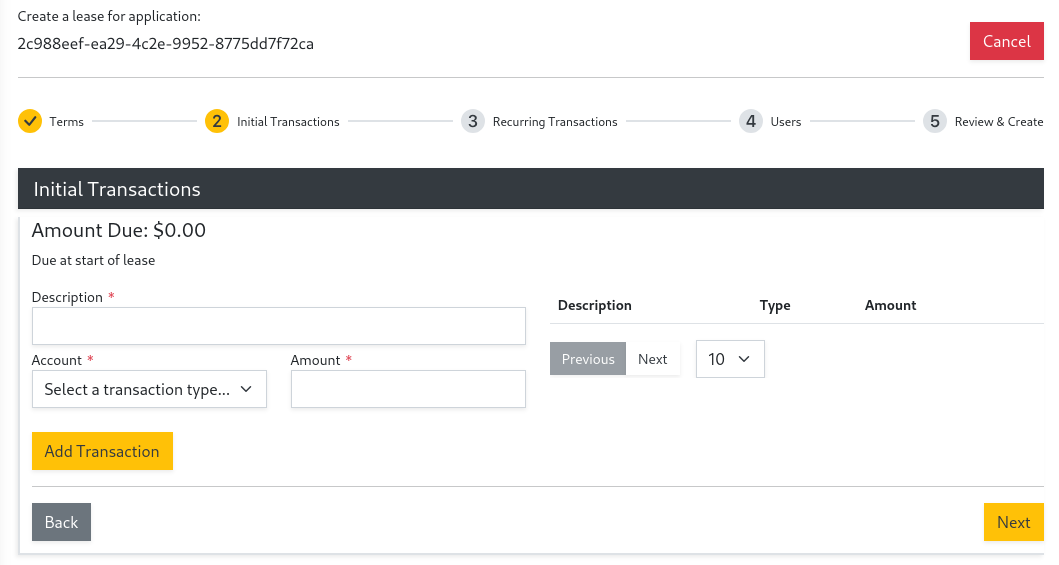
- (Optional) Add
Initial Transactionsif desired, then clickNext.
You can always add transactions later.
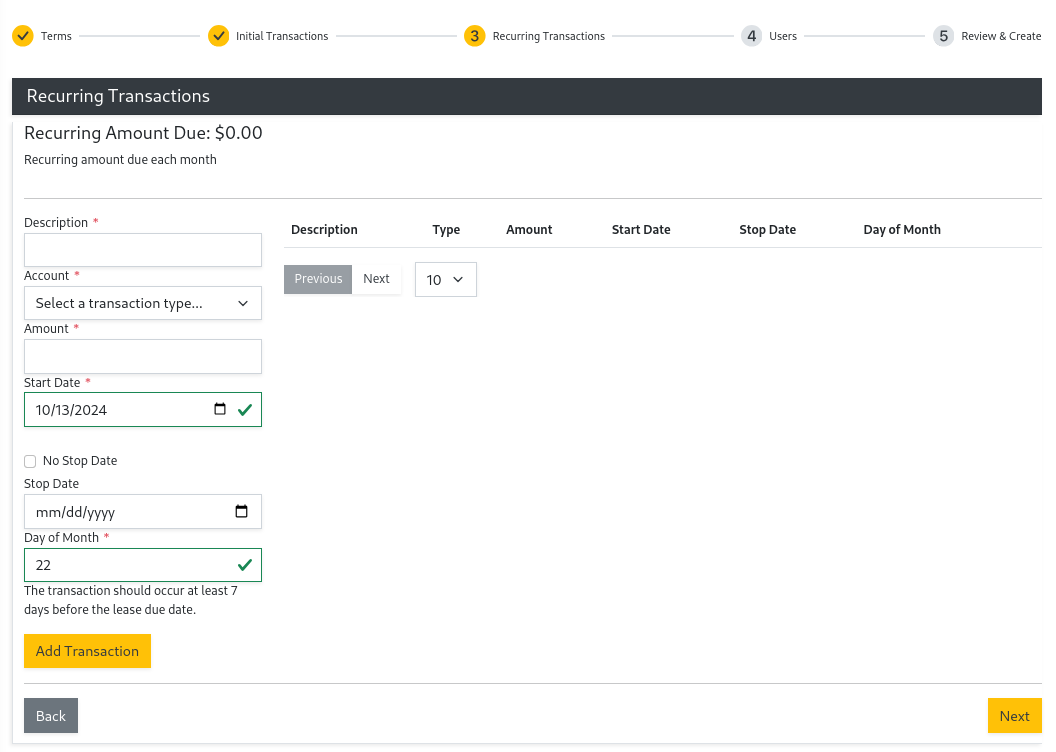
- (Optional) Add
Recurring Transactionsif desired, then clickNext.
Recurring transactions are transactions that are added automatically each month. You can always add recurring transactions later.
- (Optional) Add any users that will need access to the tenant portal by filling out the details below and clicking
Add User. Then click Next.
Users will receive an invitation email. You can always add users later.

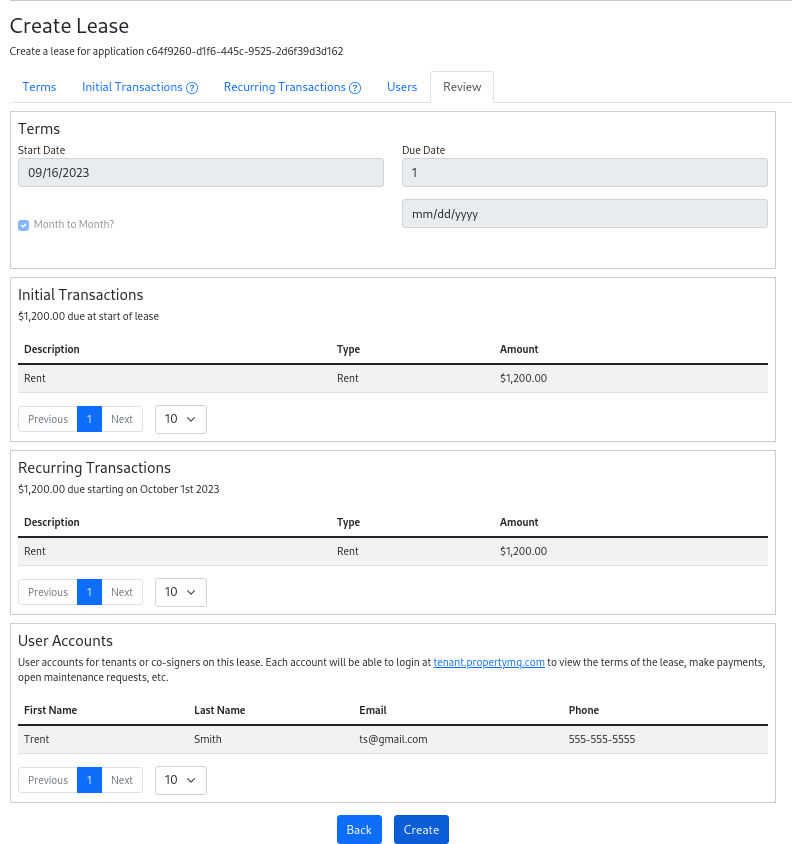
- After reviewing the lease click
Create.